Browsing Category

instagram

Blog, Clementine, instagram, iphone

How I Take and Edit an Instagram Photo


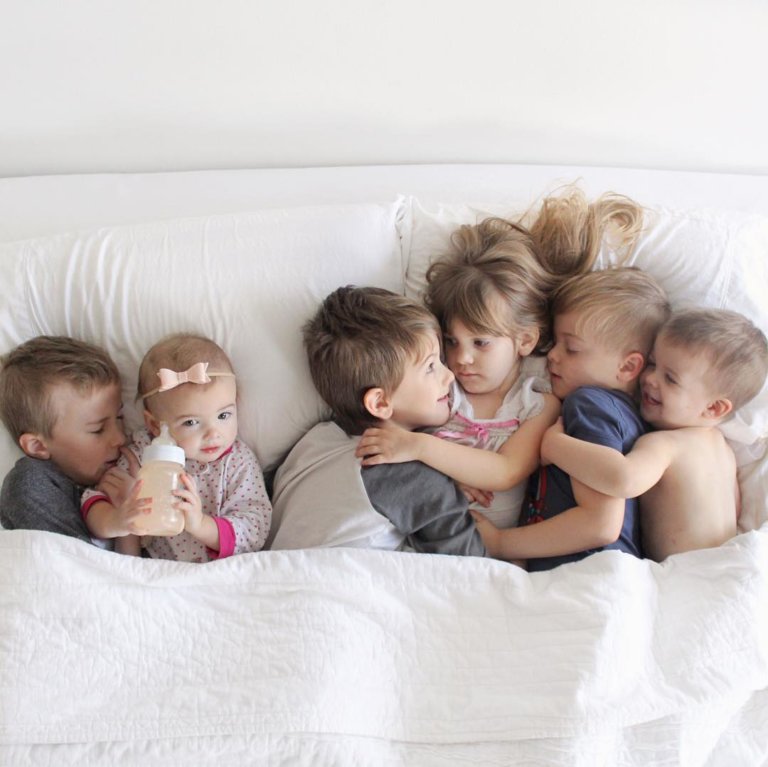
I’m wrapping up my little 3 part “Instagram series” with this behind the scenes look at how I take an Instagram picture and edit it. You can find Part One (where I shared how I became an influencer) right HERE and Part Two (where I shared tips on how you can improve and grow your own feed) HERE.

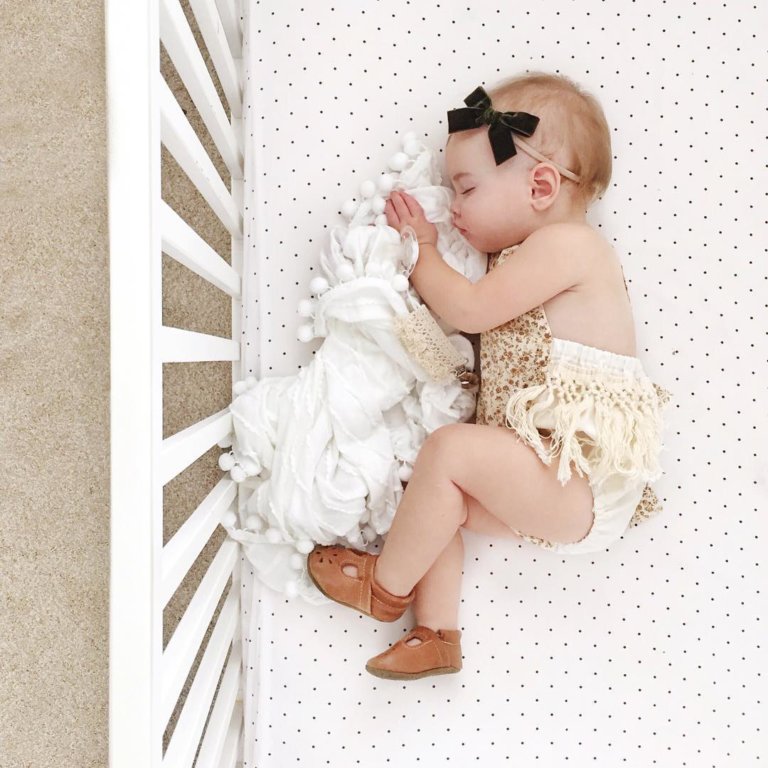
I love behind the scenes stuff so I thought this post would be fun! I wanted to answer a few questions I get about my pictures (what camera I use, how I get pictures of Clementine sleeping, how I edit, etc.) So hopefully this post is helpful!

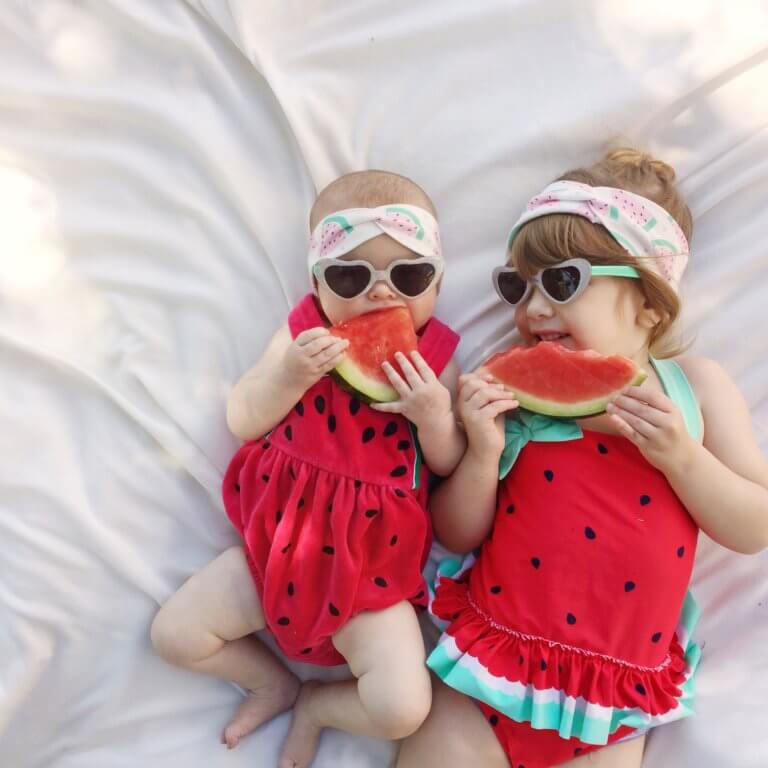
I could take this post a lot of different directions (phone vs. dslr, group shot vs. individual, etc.) But since I do get so many questions specifically about the sleeping Clementine pictures, I thought that would be a great example to use. And I always use my phone to get these shots so keep that in mind.

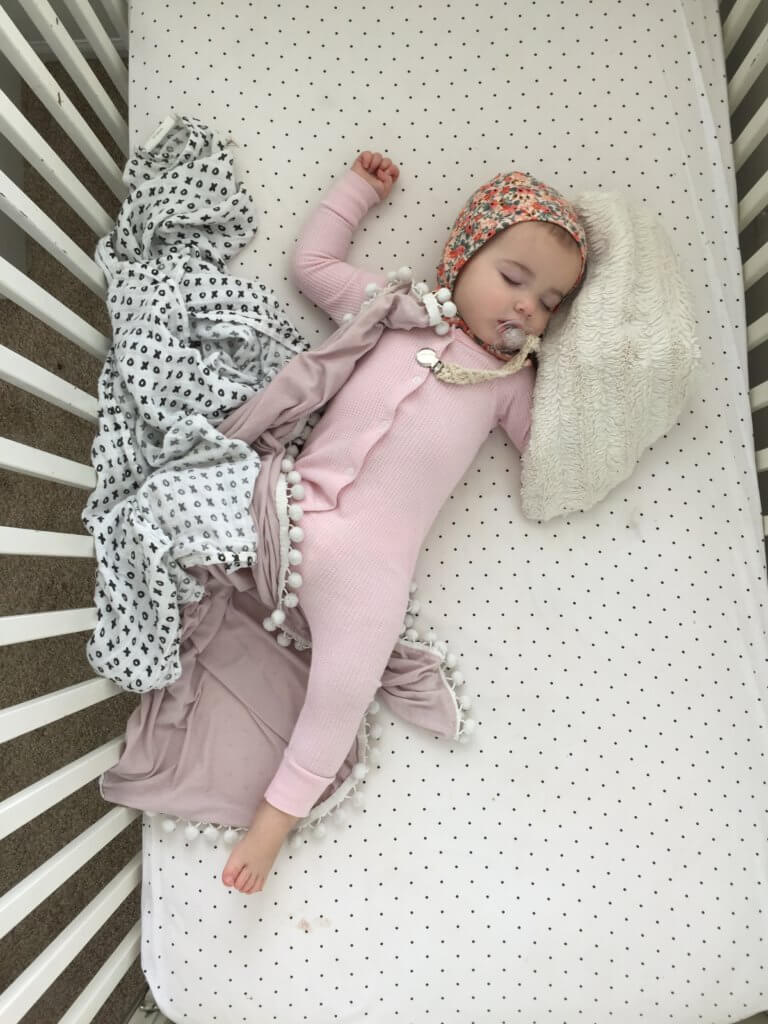
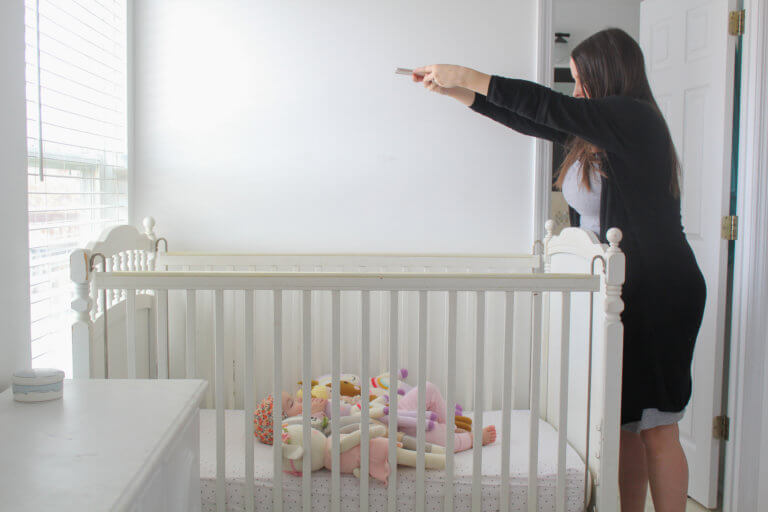
A lot of people want to know how I’m able to get well lit pictures of her sleeping so I’ll just show you the current (crammed) setup of her crib in our room.

As you can see, the light is flooding in directly by her bed. She’s been sleeping right here since she was itty bitty and she’s always been used to sleeping with the blinds open. So the light does not bother her while she’s napping. And as far as noise goes, we always use a fan at naptime and bedtime and since she is in our room, we are in and out of there a lot while she’s sleeping. So I feel like at this point, she can sleep through quite a bit.

Anyway, when I am planning to get a sleeping picture of her, I usually just lay her down with her little lovey that she won’t sleep without (from Stella and Lu) and leave the room until she falls asleep. And in case you’re wondering–yes, I do plan these pictures out in my head ahead of time. Sometimes I do it to display a product collaboration and sometimes it’s because I think it’s adorable. But I’m pretty sure all her naptime photos are planned before she even goes to sleep.

I check back in on her about 10 minutes later and 99.9% of the time, she’s sleeping. This is the point I take a picture because she’s in a deeper sleep and won’t startle awake as easily. However, whatever position she’s laying in when I walk in to check on her (on her back, belly, or side) I just have to work with because there’s no way I’m risking flipping her over just for a picture. So for the example I’m going to use, when I walked into our room, I found sweet Clementine napping like this…

I was excited that she was on her back because that’s the vision I had in my mind. But she was sleeping at an angle so I had to gently scoot her over to the center. Usually I don’t adjust that much but I had a very particular setup in my mind this time so I took the risk and moved her over.

I wanted to get a picture of Clementine sleeping with all of the Cuddle and Kind dolls we have. Evangeline and Kingston had the opportunity to be in a video shoot for them recently and they each got a doll in return. So after adding those 2 dolls to the 4 dolls we already had, I knew I wanted to get a picture of all of them together. **A little side note–This company does amazing things by donating meals to children in need. This weekend they are doubling their impact. Each doll sold= 20 meals donated! (No coupon required.) And you can get free shipping by using the code GIVETHANKS. This post isn’t sponsored by them but I always love to share about this company!

Anyway, this is one of the first pictures I took (it’s completely unedited.) I always start out with some test shots before I move anything around so I can get a better idea of what I want for the picture.

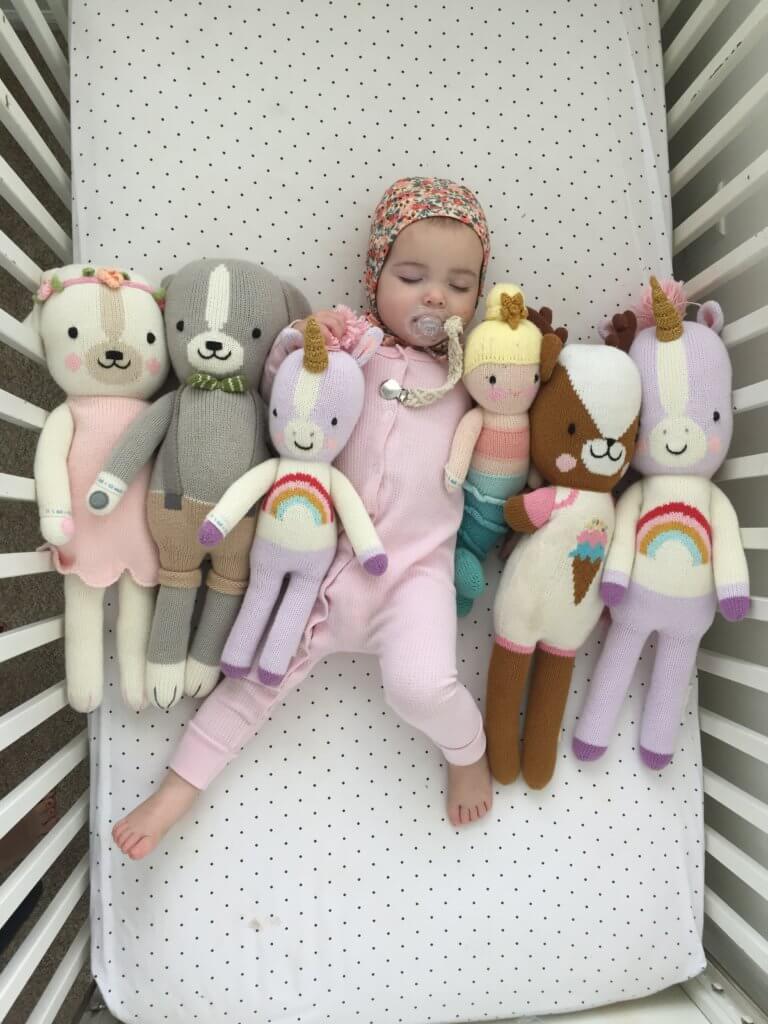
After I see the first shots, I start to make adjustments. I didn’t like how crammed it looked with all 6 dolls and I also didn’t like the repetition of the two unicorns so I took the smaller one away. I also didn’t like the way her legs looked so I tried to adjust those a bit. Sometimes she moves how I want her to, sometimes she doesn’t. After I felt like I had everything else adjusted, I took out her pacifier and started taking pictures. And here’s a dorky shot that I had Don take to show what I look like when I’m trying to get a picture. Whatever it takes to get “the shot.”

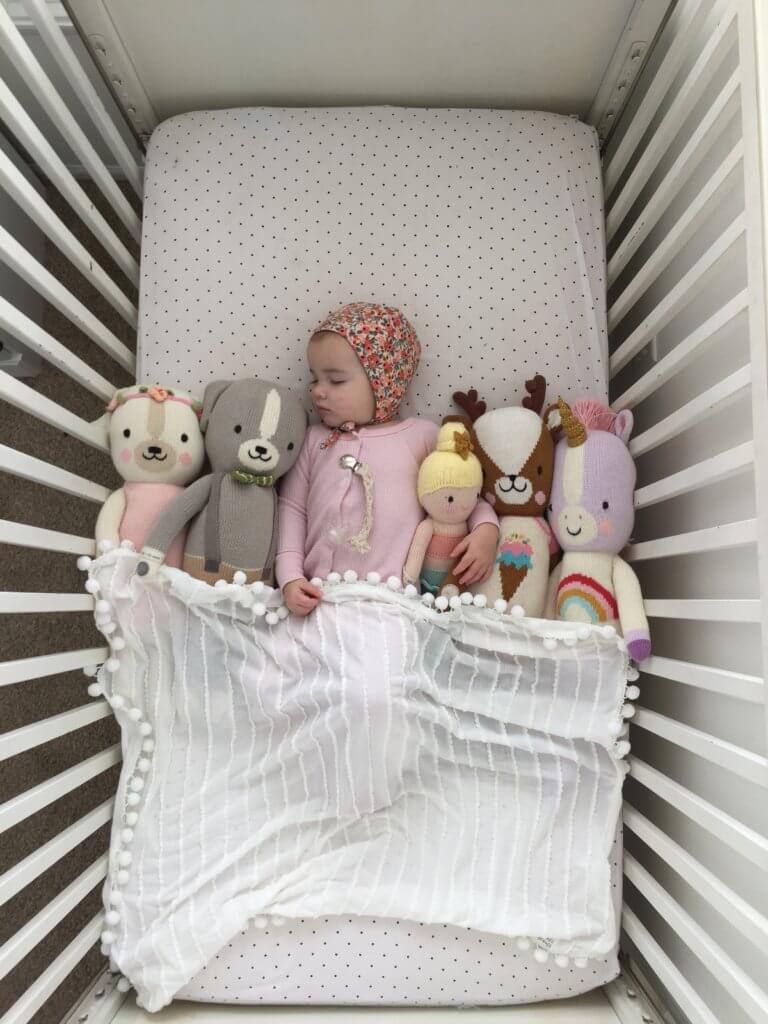
Because her legs were looking weird to me, I grabbed a blanket to cover them up. I kept making small adjustments until I liked the way everything was lined up. I ended up with the shot below. This was the last picture I took (after taking a ton.) P.S. that arm around the mermaid was actually something she did on her own and I love it!

So here it is unedited…

And here’s the edited version…

(Editing to add a disclaimer! When I posted this photo to Instagram, I felt that it still looked a little dull so I deleted it and then bumped up the brightness, highlights, and contrast through the Instagram editing.)

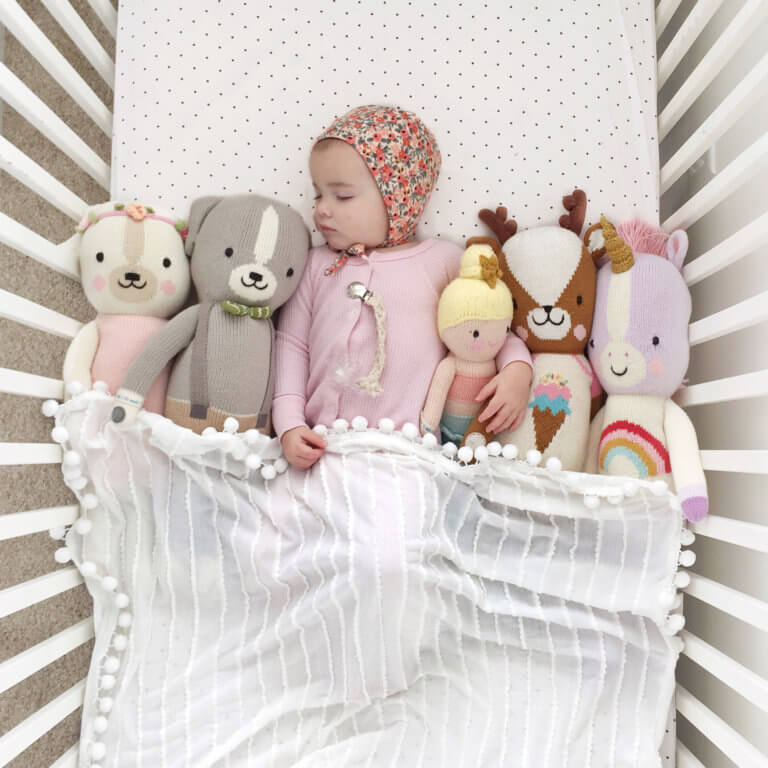
As you can see, I brightened it up quite a bit. The thing about editing is that everybody has a different style. And that’s okay! That’s what makes photography more interesting! My husband and I have opposite taste in editing. I like light and airy, he likes dark and contrasted. If this editing style is not your thing, that’s fine!

However, if you’d like to know how I got this final result, I actually made a video to share my editing from start to finish. Unfortunately, when I uploaded to youtube, it didn’t upload the audio. I was actually talking throughout and explaining each part but the audio didn’t carry over for some reason. Hopefully I can get that issue resolved if I do another video like this. But this time I guess you can just be thankful that you didn’t have to listen to my nasal-y voice.

To quickly summarize, I start with Snapseed to brighten, fix any discoloration, and “heal” out imperfections (like the stuff that didn’t get vacuumed up beforehand 😉 ) Then I usually run my pictures through A Color Story to put a filter on it (Punch from the Blush pack is my current favorite) and use the curves until I like the finished result. And then I do my final adjustments in Instagram (like changing perspective and straightening the picture.) I’m still working on my editing skills because I really never feel like that’s my specialty. But I know I have seen improvement at some point in the past few years.

Anyway, here is the video for you to see how I got the final picture! If you have any questions or think you’d like more examples, please let me know! Have a great weekend!

Blog, instagram

How to Improve and Grow Your Instagram


Last week I shared my story about how I became an Instagram influencer. I promised that I would come back and give some tips for how to improve your feed and grow your instagram. This post definitely requires a major disclaimer right from the beginning. There are posts like this all over the internet. And I’d say probably everyone is more qualified than I am to give advice. However, I still wanted to share a bit from my perspective since I think I have a slightly different view than other people.

instagram sponsorship tips


How to Improve your Instagram Feed

The first step to becoming an influencer is to make your overall feed look good. When someone clicks on your feed, you have a few seconds to impress them before they either decide they’re interested or they click away. You don’t have to be a professional photographer or own a fancy camera to make your feed look good. Until the past month or two, probably 98% of my pictures were actually just taken on my iPhone. I have incorporated more DSLR pictures lately. But even still, I would still say the majority are iPhone photos.

You want your feed to have a very cohesive look, with all the photos having the same style. So it’s important that you figure out the style you like and then be consistent (with your photography and editing style.) Whatever “style” you choose, make sure you’re choosing it because it’s something YOU love. Not because it’s what everyone else on Instagram is doing.

This post isn’t going to give you a full guide to better photography (especially because I’m not qualified.) But I do want to share a few things that I do with my pictures. Just keep in mind that these are general “rules” and sometimes rules are meant to be broken. But first things first. Clean off your lens before taking pictures! I can’t tell you how many times I looked back at pictures and noticed they were blurry because my phone lens wasn’t clean.

1) Utilize natural light

In my opinion, this is probably the best advice for improving your photography. I try to take all my indoor photos as close to a window as possible. We get creative with how we make that work; sometimes moving furniture around.

Outdoors, we try to work with the weather or the positioning of the sun. While more light is always better when it comes to photography, you don’t want direct sunlight (of course there are always exceptions.) I love overcast days or sunny days with lots of cloud coverage. And when it works with our schedule, we try to take pictures at golden hour–the hour before sunset (or the hour after sunrise but there’s no way we’re up and ready that early.)

how to collaborate with brands on instagram

2) Simplicity

Pictures always seem easier to look at when you are able to easily spot the subject of the photo. Details are fun and can absolutely be integrated in the picture. Just make sure the overall photo isn’t too busy. You want someone’s eyes to settle on the subject immediately. I love using simple backgrounds for my photos to make the subjects pop. And companies also love this because it means their products will stand out instead of getting lost in the chaos.

how to collaborate with brands on instagram

3) Rule of thirds

If you aren’t familiar with this photography term, it’s just referring to the placement of your subject.  If you imagine your photo divided into 3 equal sections, you place your subject on one of the dividing lines. This is a very simple explanation so if that doesn’t make sense, feel free to google to get a better idea. I don’t always follow this rule. It just depends on the look I’m going for. But it definitely adds interest instead of always centering your subjects.

how to get paid to promote on instagram

4) Mix it up

You don’t want your whole feed to look like you are taking basically the same picture over and over again. Get creative with different setups, angles, and styles of pictures. Instead of always taking closeups, try stepping back to take in the whole scene. Instead of always taking a picture straight on, try to take a picture from above. Just try mixing up the look of your pictures so that it adds interest when people are clicking over to your page and seeing your feed as a whole.

On the flip side to this, I also like to do some “series” of photos. Like group shots of the kids, pictures of Clementine sleeping, and pictures of the 2 girls together. I just try add a little variation each time.

use hashtags to get followers on instagram

5) Don’t use borders!

Instagram now allows you to post full size photos, in addition to square crop. My personal preference is to always post square (I don’t really have any major reasons why, I just like squares for IG.) I know some people prefer the full photos. And that’s fine! But make sure you’re using Instagram’s built in sizing instead of adding borders in editing apps. It makes your feed look so much cleaner when all the photos look like the same size. And I know a lot of brands won’t repost photos if they have added borders.

6) Take a LOT of pictures

When I say “a lot,” I don’t mean 10-20. I mean however many it takes to get a picture you’re happy with. If you only knew what my camera roll looked like after attempting a picture. For every 300 pictures I take, I probably get a couple of decent ones. Then it takes me a long time to pick out my favorite. I usually bug my husband to help me pick a favorite…and sometimes I actually use the one he chooses 😉

the best hashtags to use are ones that are more niche focused and less general

7) Use editing apps

My two favorite apps for editing are Snapseed and A Color Story. I almost always pass it through Snapseed first to adjust the white balance, brightness, shadows, and ambience (I actually have no idea what this setting is actually doing but I like what it does to my photos.) I also sometimes use the brush tool for exposure–usually to brighten up a white wall or blanket. Then I use A Color Story to add a filter (my favorite is “punch” from the Blush pack) and I play around with curves until I’m happy with it. I’m still learning with this. Sometimes I’ll think a picture looks okay but then it looks awful compared to other photos or on my laptop.


How to grow your Instagram and better your chances at becoming and Influencer

There are articles all over the internet that will give you advice on how to grow your Instagram. I don’t really do what others advise but I’ll share what I do!

1) Be authentic

I think I kind of covered this in my last post. But authenticity is so key. It’s hard for me to want to follow someone when they portray their life as perfect. Now here’s what I’m not saying–I’m not saying that you need to take pictures of your messy house and makeup-less face to be authentic. There are ways to show that you are a normal, imperfect human–just like everyone else–but still share pretty pictures.

Real, genuine captions are definitely helpful. You don’t have to share every detail of every day. You don’t even have to make it super long. But people feel more connected with you when you come across as a real human. Share your highs and your lows. I love getting to know people on Instagram, not only through their photos, but also through their writing.

2) Engage

I can’t tell you how many times people have been surprised that I responded to them. Now, I used to be way better at responding to every single comment. But sometimes I miss them when they’re on an older post and I don’t see them for weeks or even months later. But I try my best to respond to everyone who comments. When someone takes time out of their day to leave a kind comment, the least I can do is acknowledge them by responding and answering questions.

I also try to make a point to stop and engage on other people’s pictures. I don’t force it. But if there’s something about the picture/caption that stands out to me, I like to leave a comment instead of keeping my thoughts to myself. This is a great way to build relationships through the app and find a community of people with the same interests! And you never know how much your comment could mean to someone.

3) Show your face on your feed

I feel like this is a good follow up to the first two points. I am always more likely to follow someone if they get in the pictures sometimes. It’s good to see the person behind the photography.

how to collaborate with brands

4) Tag brands

There are multiple reasons to tag brands in your photos. First of all, it’s helpful for others to know where you got a certain item. Brands also love to see customer photos. I mentioned it on my last post already but tagging brands gives you the opportunity to be reposted on their feed, and therefore giving you more exposure and the possibility of more followers. It also allows other shops to see that you do a good job representing a brand. That gives you the opportunity to work with companies who like your style.

5) Use hashtags

I know some people aren’t too fond of hashtags. But they really do help your pictures get more exposure outside of your followers. Some hashtags are brand related or associated with certain accounts and therefore give you another chance at having your picture reposted. I like using hashtags that are relevant to motherhood and children and are very community based. I avoid very general hashtags like #mom, #kids, #fun, etc. because they are so overloaded and usually not helpful. I keep a list of hashtags in the notes section of my phone so I can quickly copy and paste the relevant ones into the comments of my pictures.

6) Share what you love

This one kind of has a double meaning. First of all, the obvious. Share what you love–meaning your family, your clothes, your home. You want your feed to reflect who you are. So make your feed showcase that.

Secondly, share material items that you love. If you love a certain shop because their products have amazing quality and fair prices, tell people about it. Do product reviews…even before a company asks you to do one. When I did my first product review about Tubby Todd, I had just found out about their All Over Ointment and was just so excited to share my thoughts on it and was so hopeful it could help others. After that post, I started getting multiple messages from companies who wanted me to try their products as well. Promoting companies shows other companies that you’re willing to share your experiences.

7) Post consistently

In order for your feed to remain relevant, try to post as consistently as possible. I aim for around one picture a day. However, don’t post a picture just for the sake of posting a picture. Make sure the picture is something you’re happy with.

iphone photography tips

8) Giveaways and Like/Comment Pods

I actually haven’t used either of these methods to grow my feed but I thought I would mention them because so many other people do. Hosting a giveaway that requires people to follow you for an entry method is a good way to quickly get followers. However, be prepared for a dropoff in numbers after the giveaway is over. It does give you more exposure so people may find that they like your account and therefore stick around. I personally don’t like doing this because I don’t want people to be following me out of obligation. But I’m also weird and kind of have a list of “rules” set up for myself on Instagram.

Like/Comment pods, from what I understand, have about 10-15 people who keep an ongoing group message. When someone posts a new photo, they share in the group message and everyone quickly goes to the picture and “likes” and/or comments on it. This is supposed to help give the post more “value” in the algorithm and therefore will be seen by more people. This can be a great way for you to build a community with people who have the same interests and it can help your picture get more exposure. However, I have struggled with thoughts about this not feeling authentic so I don’t take part. This is where I feel like it’s very important to consistently engage with other accounts that you love and they will be more likely to engage with you in return!

how to be a social media influencer

 And with that, I think I’ll wrap up this super wordy post. I’m really excited about the next post I have planned for this little “Instagram series.” I am planning on putting together a “behind the scenes” look at how I get a picture (in this case, it’ll be a picture of Clementine napping.) I’ll start with how I come up with the idea, how I make it happen, and how I edit the photo afterwards.


If you have ANY questions or want me to expand on anything, please let me know. I just feel like there’s just too much information to put in one post so I find it difficult to narrow down my thoughts. But I always love to hear what’s on your mind so feel free to comment! Thank you so much for reading and I hope this was somewhat helpful! Have a great Thanksgiving week!